Creating a Stepped 3D Polar Array
When creating a polar array, you can also create rows and increment the elevation between successive rows in the array.
For example, the exercise file contains a chair and some curved risers. Suppose you want to create four rows of chairs and to have each row be placed on the appropriate riser. Since the risers are curved along an arc, you can use the Polar Array tool to do this.
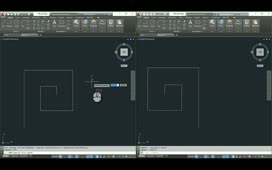
On the Home ribbon, in the Modify panel, click the Polar Array tool. The program prompts you to select objects. Click to select the chair, and then right-click to complete the object selection.
The program prompts you to specify the center point of the array, or you can choose one of the other options. Use Center object snap to snap to the center of the arc.
As soon as you do, the program places six copies of the chair, arrayed 360-degrees around that center point. Since you want 12 chairs in each row, choose the Items option. The program prompts you to enter the number of items in the array. Type “12” and press ENTER. Now you have the correct number of chairs, but they are still arrayed all the way around a circle. Right-click and choose the Fill angle option. The program prompts you to specify the angle to fill, and also reminds you that positive angles increase in a counter-clockwise direction, or you can specify a negative angle to array the items in a clockwise direction. The risers form a 90-degree arc, but since the chairs do need to be arrayed in a clockwise direction, type “-90” and then press ENTER.
Now you are ready to add some additional rows of chairs. Right-click and choose the ROWs option. The program prompts you to enter the number of rows. Type “4” and then press ENTER. Next, the program prompts you to specify the distance between rows. Since each riser is 36 units deep, type “36” and then press ENTER.
Now you can see all of the chairs, but they are still flat on the floor. But now, the program is prompting you to specify the incrementing elevation between rows. This prompt appears whenever you modify the rows. Since the risers step 12 units between each row, type “12” and then press ENTER.
Now the chairs are arrayed properly on each riser, but the last chair in each row is not on the risers. Since this is an associative array, you can easily fix that. Click the triangular grip at the end of the first row of chairs and then move the cursor to the left until you eliminate one chair in each row. When you are finished modifying the array, end the command by clicking the Close Array button in the ribbon, choosing the eXit option, or simply pressing the ESC key.
Source: Autodesk