Need to take a break from those Thanksgiving leftovers? How about these quick tips and pointers on AutoCAD transparency and arrays:
Contents
Transparency
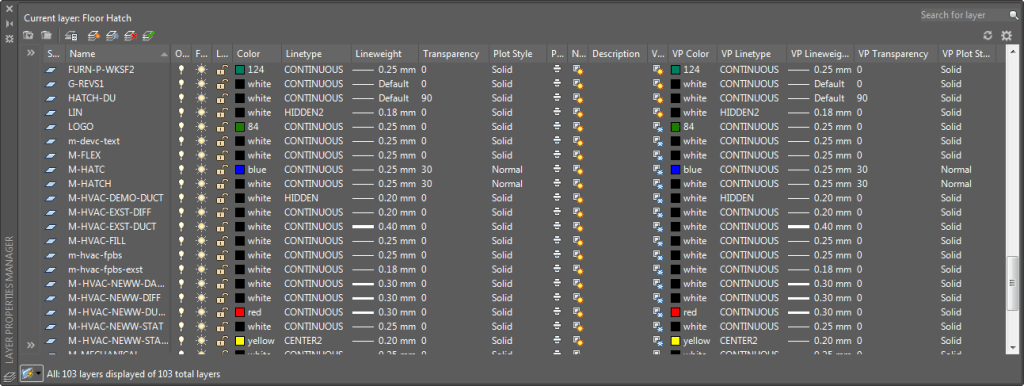
You can assign transparency to objects and layers much like any other property! Set the transparency to a value between 0 and 90: 0 indicates no transparency, while 90 indicates high transparency.
You’ll find the Transparency property in all the Layer dialogs. You can even assign Transparency per viewport.
You can also set transparency per object; it will override the layer transparency setting. Transparency can be easily found in Properties or on the Home tab.
Bonus Tip! The system variable CETRANSPARENCY can be used to set the transparency property for new objects.
Note: SETBYLAYER, Quick Select, Filter, and MATCHPROP now include transparency as an option.

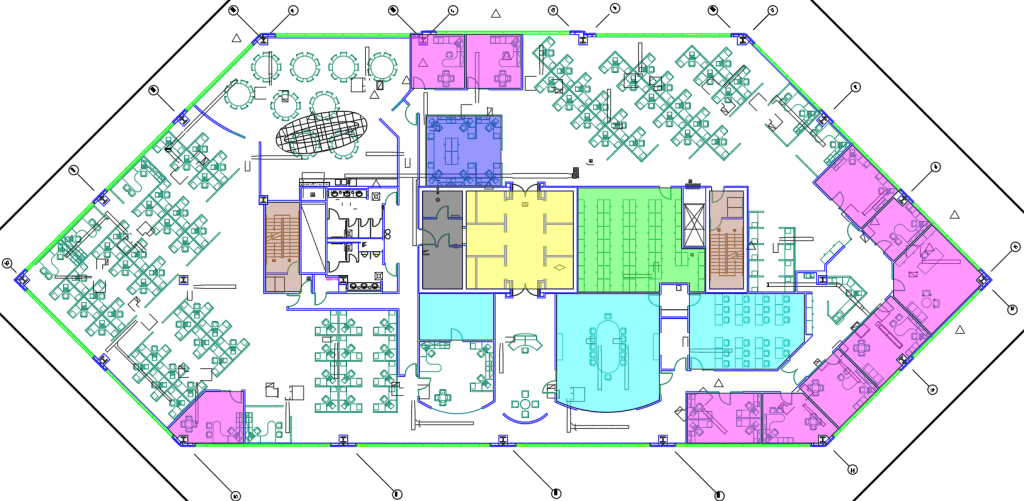
Bonus Tip! Transparency works great with solid hatches!
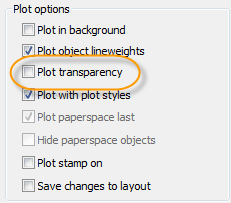
Note: By default, transparency is turned off for plotting because it has to rasterize the drawing (which slows down plotting). Don’t forget to turn it on if you want your transparencies to plot!
Rectangular and polar arrays
The visual preview makes it easier than ever to get your array correct the first time. Rectangular arrays are automatically displayed in a 3 (row) by 4 (column) grid. Polar arrays are displayed in a full circular pattern of 6.
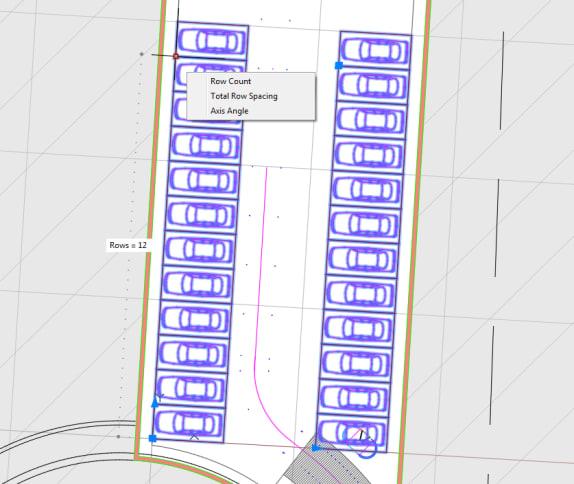
The multifunctional grips can be used to quickly increase/decrease the number of rows or columns—or to control the spacing between the rows and columns.
Path Arrays
Use the Path option in the Array command when you want to evenly distribute objects along the entire length of a path. Acceptable paths are evenly distributed along the entire length of the path.
The item count toggle enables you to indicate a specific number of items to be arrayed, or to fill the path with the items. When off, an additional grip at the end of the array appears to provide dynamic editing.
More Tuesday Tips
Come back next week for help with Point Clouds, and don’t forget to check out the full Tuesday Tips With Lynn series in the meantime. Want it all in one place? Register to download the Best of Lynn Allen’s Tips & Tricks!
Source: Autodesk
