Learning
Seth Cohen

In our last article, we discussed the basics of the Options dialog box and how you can navigate it. In part two of our series, we will delve into some of the specifics of the settings that allow you to customize your drafting environment and make life easier with your daily AutoCAD use. Let’s explore each tab and look at some of the individual settings within them.
Contents
Files Tab
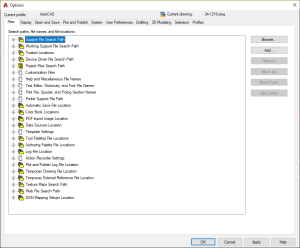
The Files tab lets AutoCAD know where all the resources are. This includes support files (e.g., .SHF, .CUIX interface file, etc.). For instance, if you ever receive this dialog box, you probably opened up a file from a surveyor or sub-consultant that is using either custom fonts or a custom linetype and AutoCAD does not “see” the shape file (.SHX extension) needed for the linetype to display.
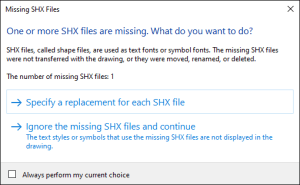
All you have to do is to get the .SHX file(s), and add a support path to your AutoCAD profile. To do so, simply click the Add button, and browse to the path where you stored it. Repeat this for as many paths as you need.
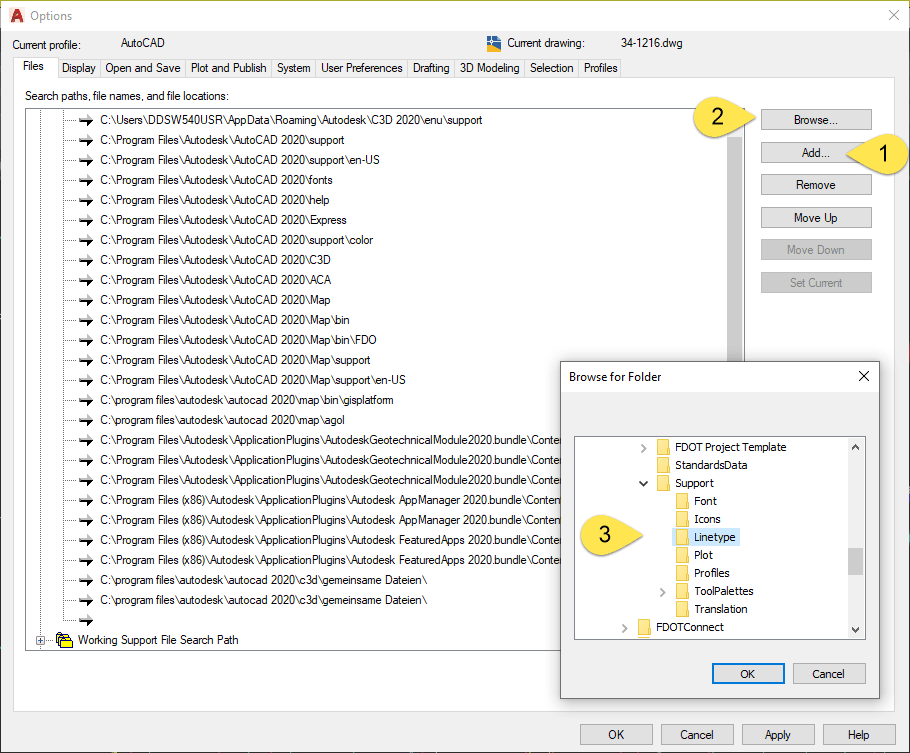
In the Files tab, you also define where all the other resources such as a company drawing template (.DWT), color tables or plot style tables (.CTB or .STB), etc. Simply expand the category and follow the same procedure above.
Display Tab
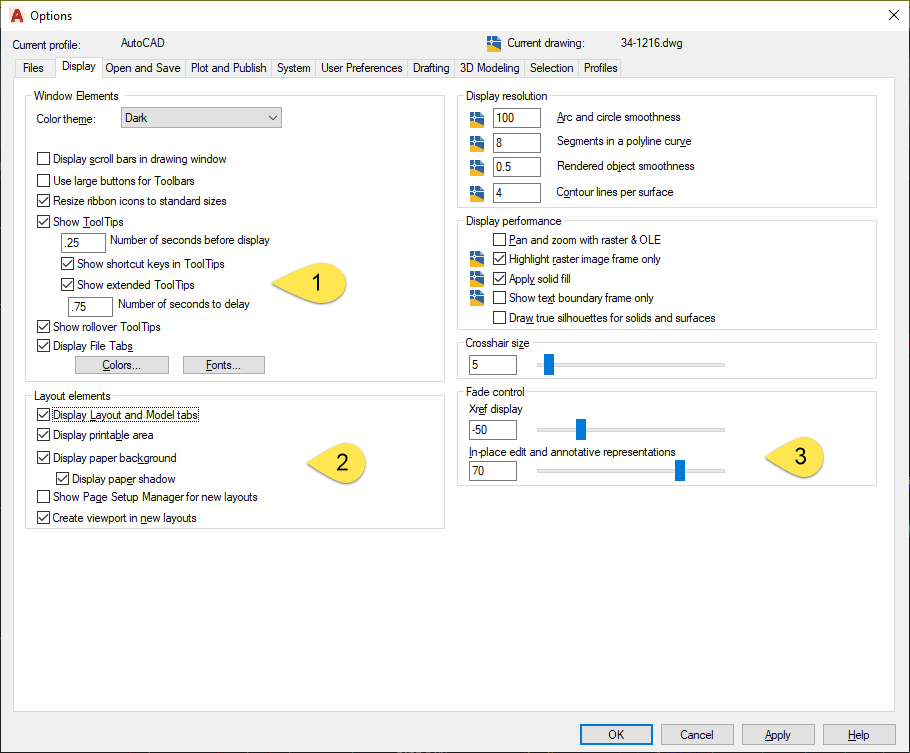
The following toggles are important to know in the Display tab. Note the corresponding numbers for each in the images throughout the article.
- Show Tooltips – Definitely toggle this on, and also change the Extended tool tips value to a good value for you to see additional help on the tools in the Ribbon.
- Layout Elements – Toggle on the Display Layout and Model tabs, and Create viewport in new layouts tab to see the tabs for easy navigation and to automate a viewport being created when a new layout is created.
- Fade Control – This is where you control the fading intensity of references if you have this option on (I get this question asked a lot by users).
Open and Save Tab
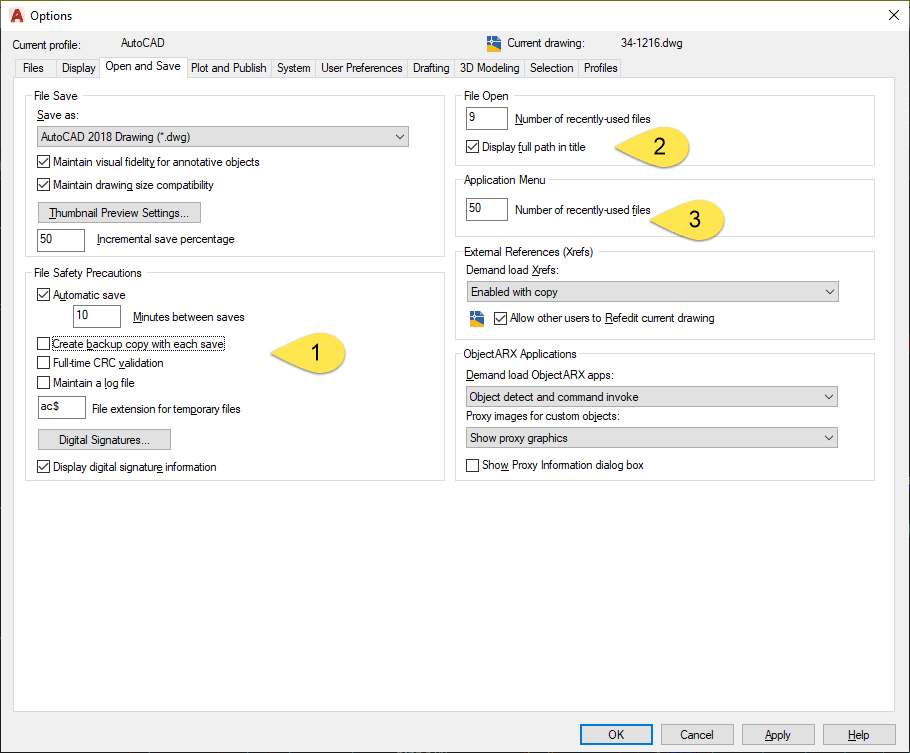
Be sure to note these toggles and settings in the Open and Save tab.
- File Safety Precautions – Toggle off Create backup copy with each save. In this day and age, we all have good backup systems, and there really is no reason to take up extra space on the server with thousands of .BAK files. Your IT person will thank you.
- File Open – I like to see the path to my file. If you do too, toggle on Display full path in title.
- Application Menu – When you go the Application menu, I like to see the full history of files that I have been in. I set this to the max, 50.
Plot and Publish Tab
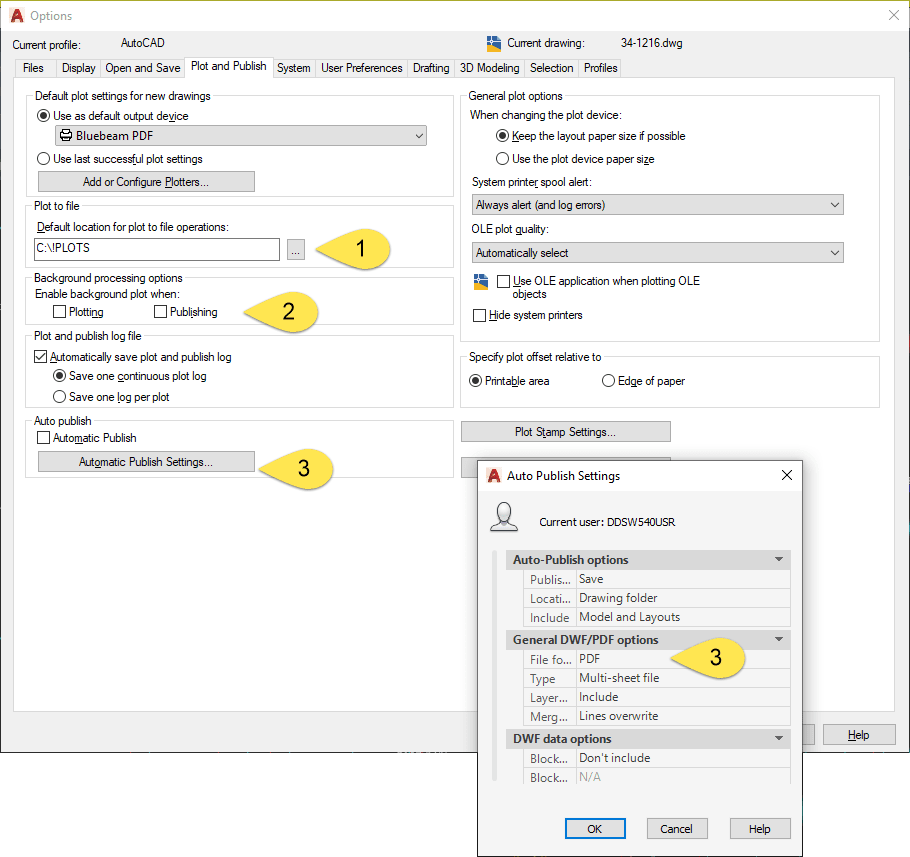
Learn more about these important toggles and settings in the Plot and Publish tab.
- Plot to File – I set this to a default folder on a server or hard drive. This way my plot .PDF’s don’t get mixed up with all my other files in the standard Windows Documents folder.
- Background Processing Options – Most definitely turn off both these toggles. AutoCAD takes a lot longer to plot/publish your files in the background.
- Auto Publish – If you plot to .PDF (like I do), you’ll want to set the Auto Publish option to .PDF.
System Tab
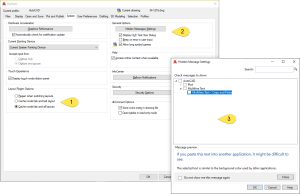
The following toggles and settings are important to note in the System tab.
- Layout Regen Options – I leave this tab set to Cache model tab and all layouts as I have a very good machine. However, if you don’t have the best system, you may adjust these settings to speed things up.
- and 3. General Options– Sometimes you will need to reset the hidden messages you may have accidentally toggled to never display again. This is where you turn them back on
User Preferences Tab
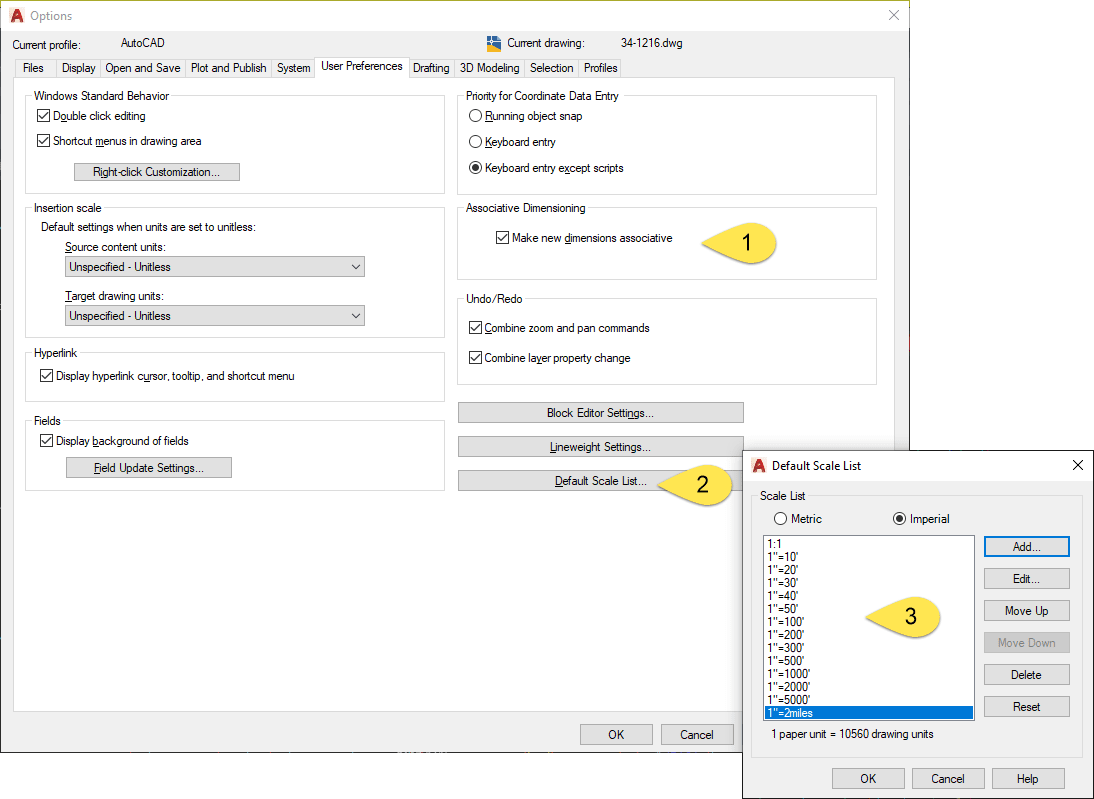
Here are the important toggles and settings for the User Preferences tab.
- Associate Dimensioning – We all want our dimensions to be associative. This toggle is a definite need to be turned on.
- and 3. Default Scale List – I do civil engineering work, and the default scales that AutoCAD sets (architectural) for the default list do not work for me. Add and remove whatever scales you work with. This way, when you reset your scales, they will come into your drawing every time.
Drafting Tab
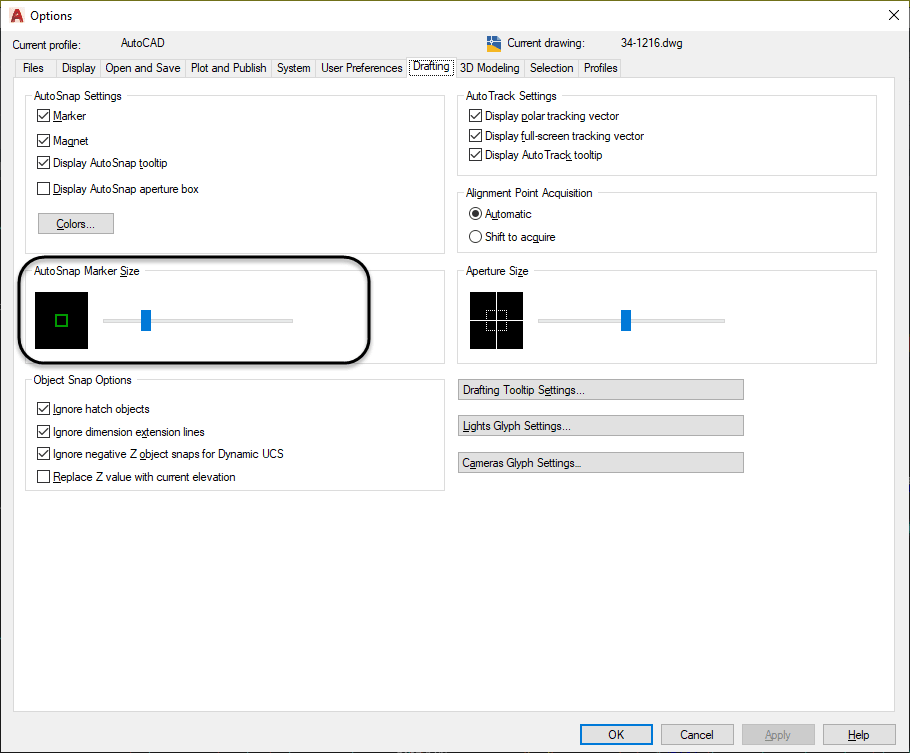
I typically leave the defaults of the Drafting tab alone as I believe they work well for daily drafting. That said, I have seen many users adjust the AutoSnap Marker size setting to make it easier to see the snap icon while drafting
3D Modeling Tab
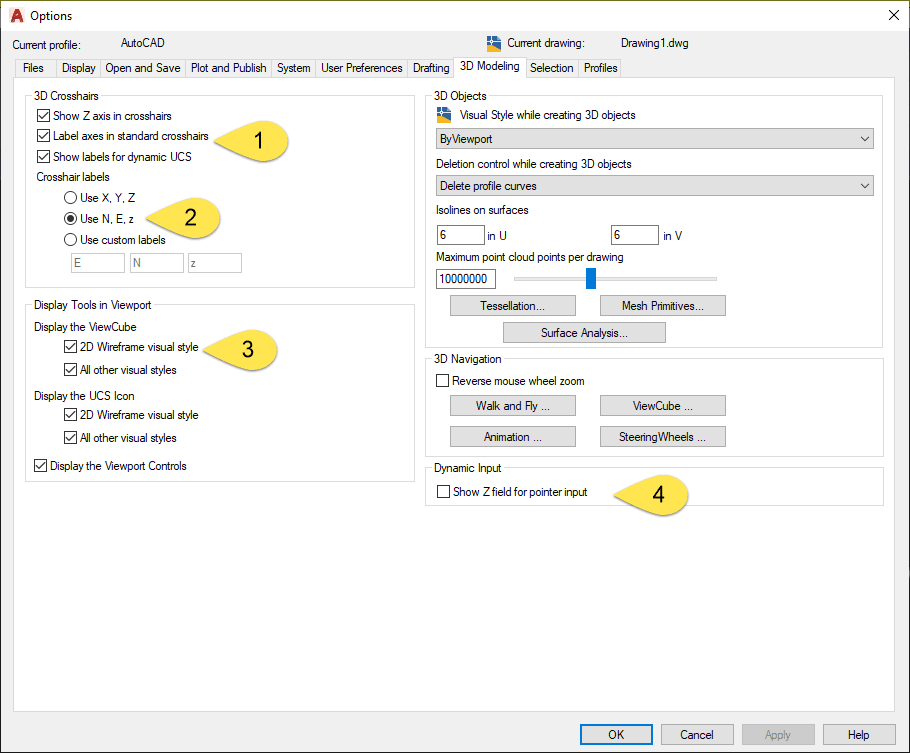
The following toggles and settings are important to note in the 3D Modeling tab.
- 3D Crosshairs – When I rotate the view, I like to see a label for the crosshairs as I rotate the view. This toggle turns them on.
- Crosshair Labels – I do civil engineering work, and the by default AutoCAD uses X, Y, Z. Well, in the civil engineering world, we deal in Northings (Y), and Eastings (X). This radio button enables me to see that.
- Display the ViewCube – In civil engineering, we almost never have a project that is straight up and down. Our projects can be at any arbitrary angle, but we still want to know which way is north. By default, the ViewCube is turned of in the 2D Wireframe visual style; the visual style that we all draft in. Toggle on the 2D Wireframe visual style to always see the ViewCube.
- Dynamic Input – When I do draft in 3D, and want to be able to see my Z value in dynamic input, I will sometimes toggle this on to show the z-field.
Selection Tab
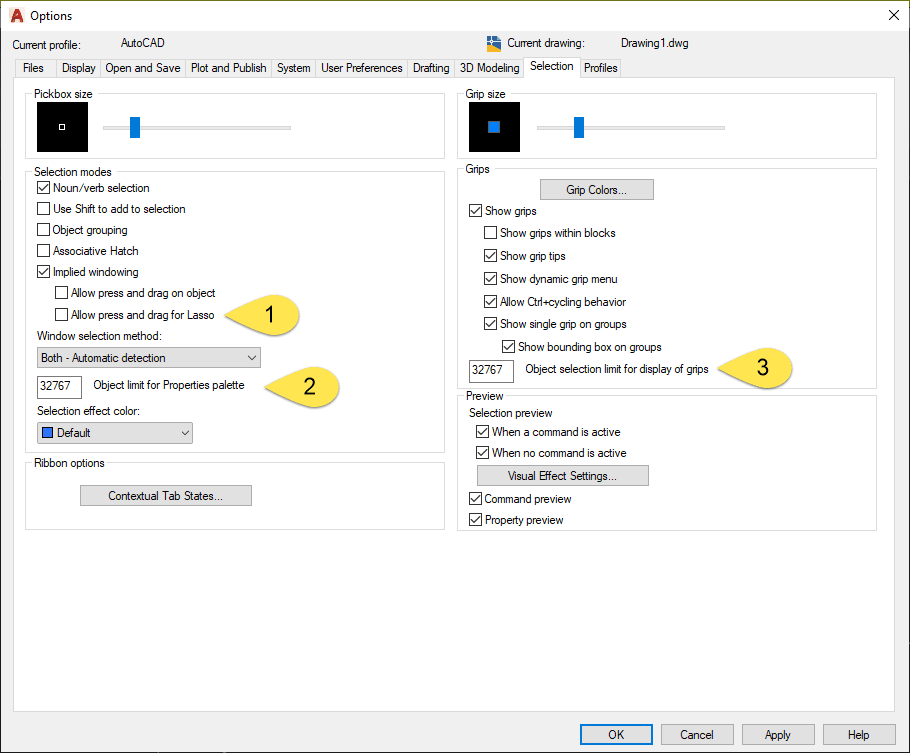
Here are the toggles and settings you should know in the Selection tab.
- Selection Modes – I have seen this a thousand times: A user goes to make a selection set, they drag the mouse, and AutoCAD all of a sudden starts to draw a blue or green selection window. That is the selection Lasso mode, and it can annoy many a user. Toggle off Allow press and drag for Lasso to disable this functionality.
- Object Limit for Properties Palette – Set this to the max so that your Properties palette will always show your selection set in it. The max is 32767.
- Object Selection Limit for Display of Grips – Set this to the max so that you will always see a selection set easily with grips in the drawing window. The max is 32767.
Profiles Tab
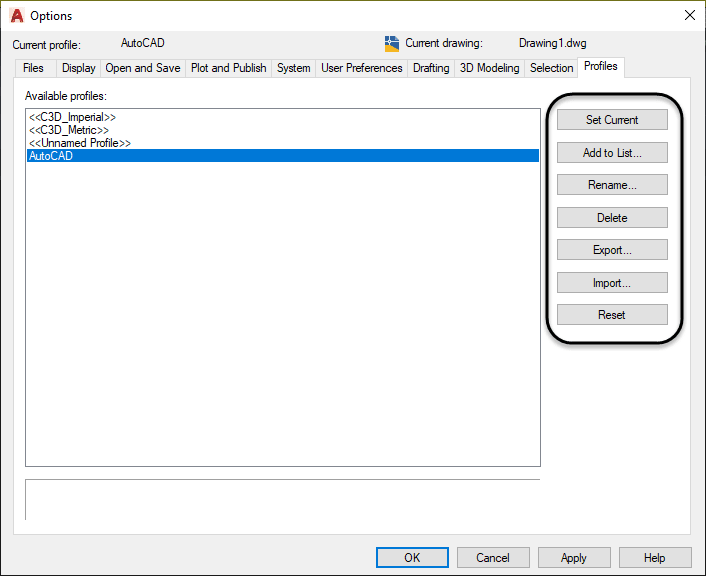
The last tab is the Profiles tab, which shows you the AutoCAD profiles that are stored on your machine. The AutoCAD profile is all the saved toggles, switches, settings, etc. that we have previously discussed in this article.
The cool thing about AutoCAD profiles is that once you have them set a certain way, you can then export them as an .ARG file and then any user can import them with the Import button located in the Profiles tab. And, as is shown in the image below, you can rename, delete, and set current any of the AutoCAD profiles you have stored.
I hope this discussion on the Options dialog box has helped you better understand the “guts” of AutoCAD!
Source: Autodesk
