Learning
Seth Cohen

Dynamic blocks provide capabilities beyond standard AutoCAD blocks. Here, we’ll take a look at how to create a dynamic block and save time, including a couple of basic examples and a real-world example that has also personally saved me a lot of time.
One dynamic block can represent multiple configurations of standard AutoCAD blocks. The Block Editor environment will help you create and edit both dynamic and static blocks. To make a standard AutoCAD block into a dynamic one, all you do is add the appropriate parameters and actions. Each parameter and action provide the ability for the block to be changed after it is inserted. After selecting the block, special grips appear that allow you to change the dynamic block.
Here are some examples of using dynamic blocks with a description of what grips are available and what they do.
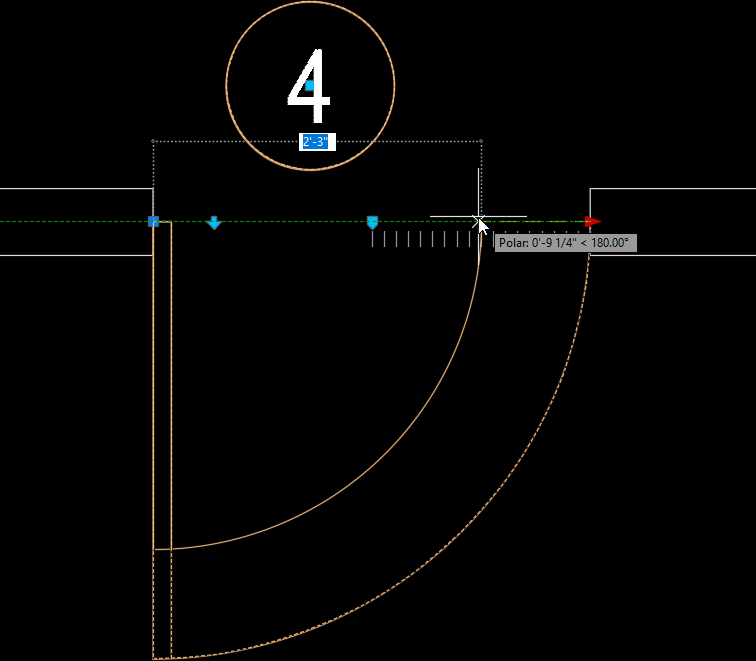
Door Block
Stretch Grip: Allows door to be stretched to multiple standard door sizes.
Alignment Grip: Allows door to be “aligned” with any AutoCAD object (e.g., line, polyline, arc, etc.).
Flip Grip: Allows door to be “flipped” (i.e., mirrored).
Point Move Grip: Allows the attribute and circle for the door schedule do be moved around as needed.
Window Block
Stretch Grip: Allows window to be stretched to multiple standard door sizes on either side.
Alignment Grip: Allows window to be “aligned” with any AutoCAD object (e.g., line, polyline, arc, etc.).
Point Move Grip: Allows the attribute and circle for the window schedule do be moved around as needed.

Contents
Real-World Example to Save Time With Dynamic Blocks
Let’s take a look at a really simple dynamic block example that not only saved me a ton of time, but made my life easier to complete the design. This example will go over how to make a dynamic block that combines a sign and the associated callout from a sign legend for a detour plan.
When I first started developing this detour plan, consisting of seven sheets, I inserted two different blocks: one for the sign and one for the callout block. I would then copy these two block, rotate the sign with the rotate command, double-click the attribute to edit it, and then rotate the attribute to the correct orientation.
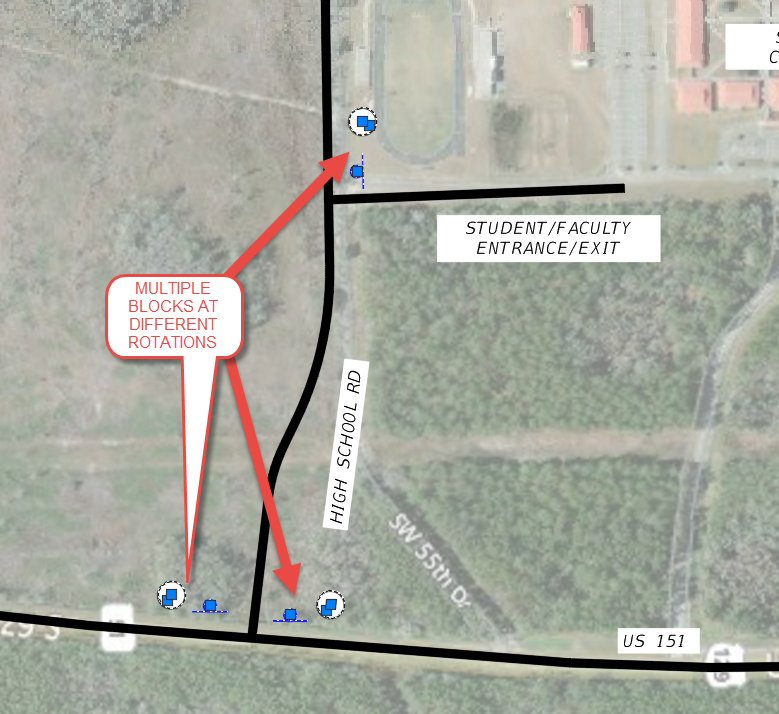
This workflow can be much more streamlined with a dynamic block. Let’s begin!
Make a Block
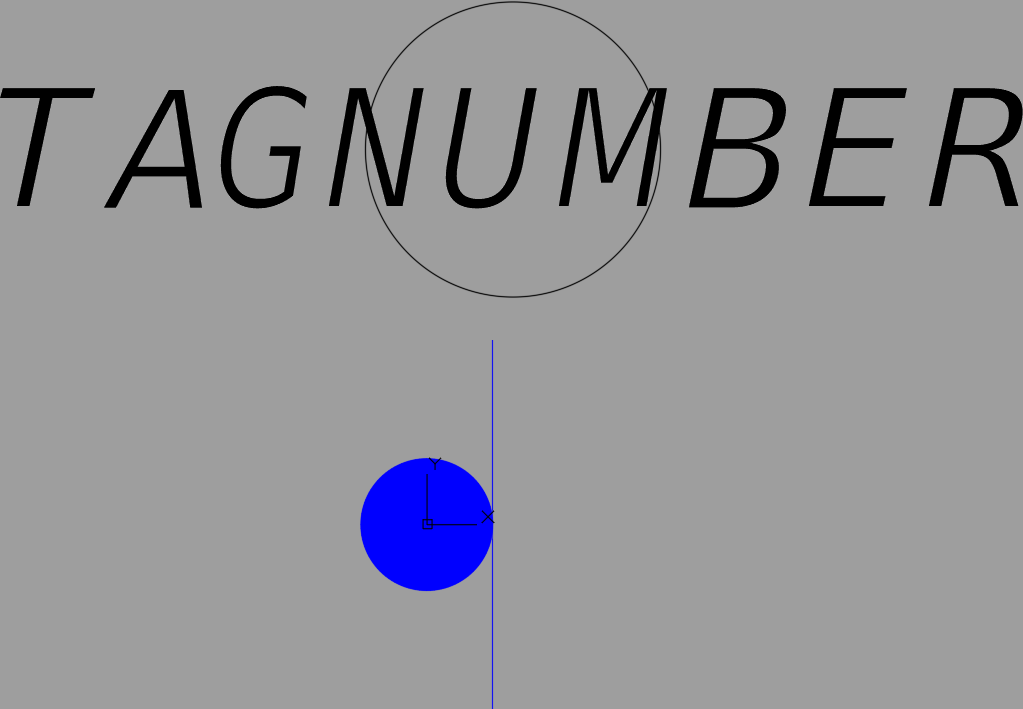
I will first open the sign block up in the block editor and insert the callout block and explode it.
If you have ever edited a block, you have seen the Block Authoring Palette pop-up. And, when it did, you probably closed it. Well, this palette is how you create dynamic blocks, so let’s see why you shouldn’t close it and explain why it’s there.
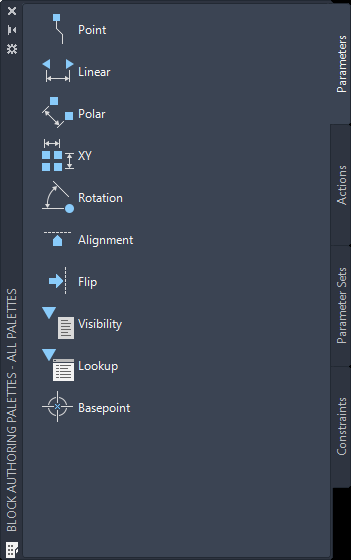
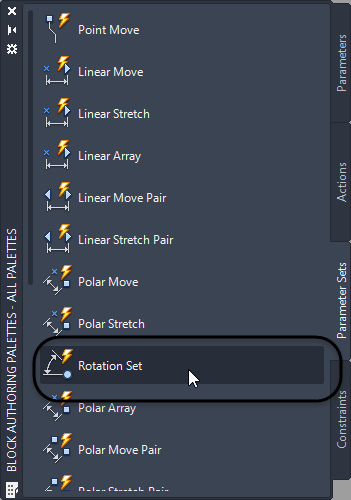
The basic workflow for creating a dynamic block is to create a parameter and then give that parameter an action. There are some parameters that can standalone like the Alignment and Basepoint parameters. Notice that there is a Parameter Sets palette. This palette combines some standard parameter/action combinations to make it easier for you.

Add a Rotation Set to the Sign
Let’s start by adding a Rotation Set combination to the sign objects. Click the Rotation Set tool in the Parameters Sets palette.
I will click the center of the circle to specify the radius and then the right quadrant. For the default rotation angle, I will polar track 90 degrees, and then place the label somewhere to the right.
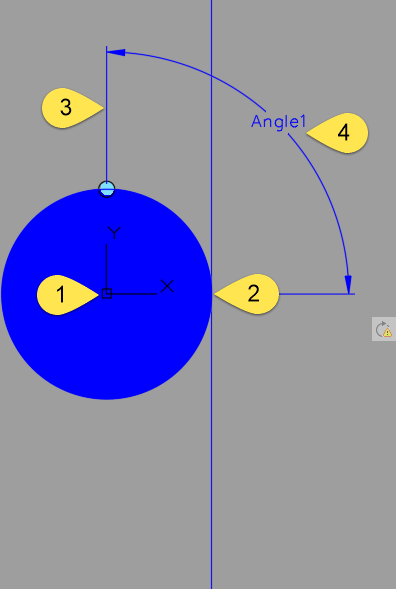
Repeat this process for the callout circle. You should now have the following in the image.
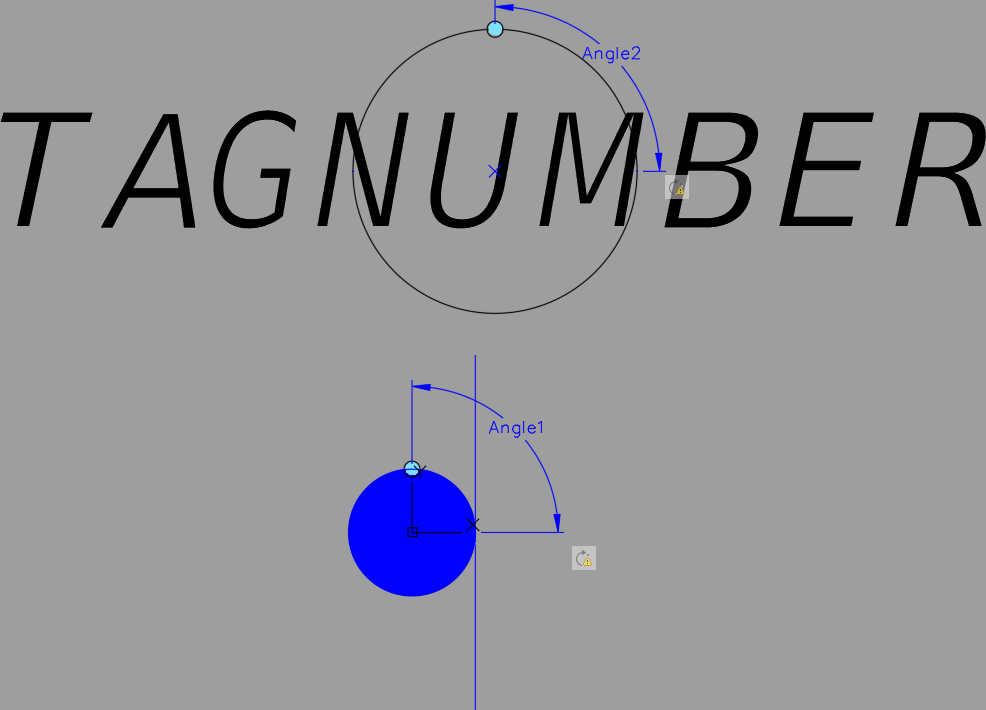
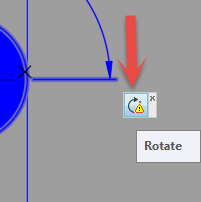
Now, we need to tell each parameter which objects they should rotate. Notice that there is a rotation action at the bottom right of each of the rotation parameters, and it has an exclamation point. This is a visual cue that the action has not been created for this parameter yet.
To define the objects for this action, right-click on it, and choose Action Selection Set > New Selection Set. Select the sign objects, and press ENTER.
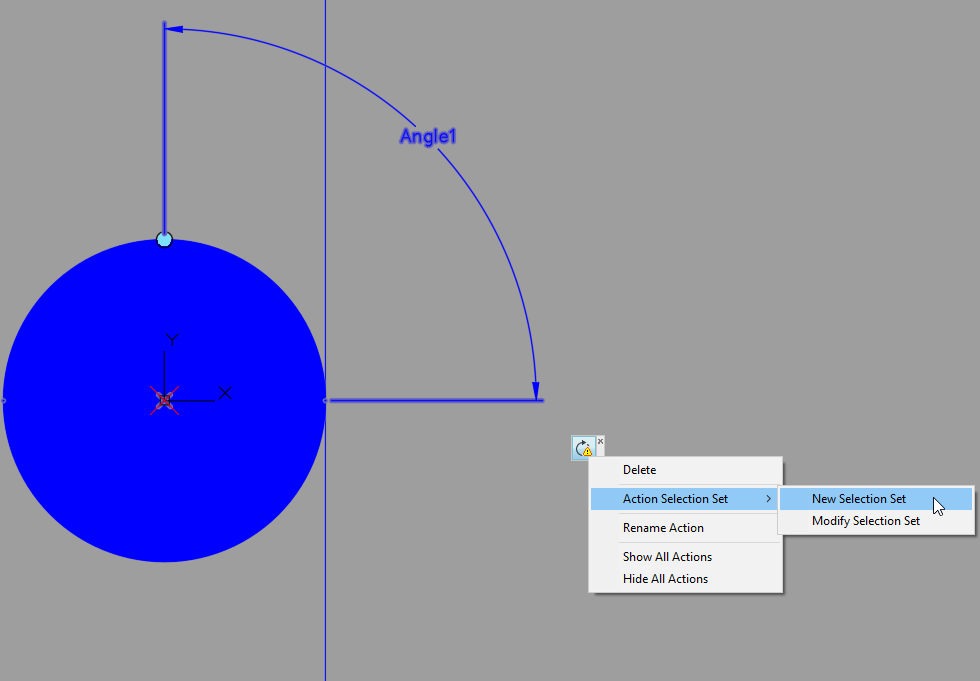
You have now completed your first dynamic block parameter and action.

Now, before we repeat this step for the attribute, you need to make sure that you change the Lock Position property of the attribute to Yes.
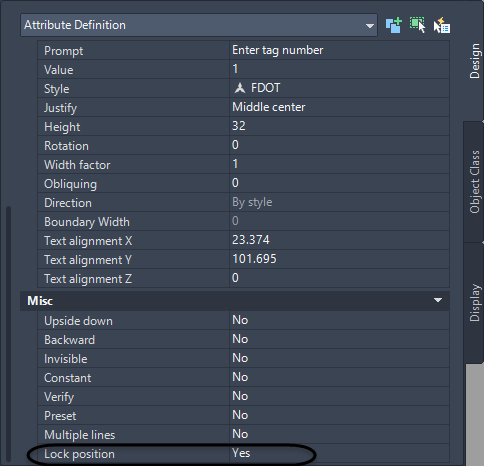
To make sure that you are rotating the attribute by the center of the circle, select the Rotation Grip and move it to the center of the callout.

Now, perform the rotation action as shown previously, selecting only the attribute.
Add a Point Move Set to the Callout
Thinking ahead as to how I will need to manipulate the different components of this block, I will also need to somehow move the callout objects around for proper orientation to the sign depending on the orientation of the road, while the sign objects stay at their required orientation.
Click the Point Move tool in the Parameters Sets palette.
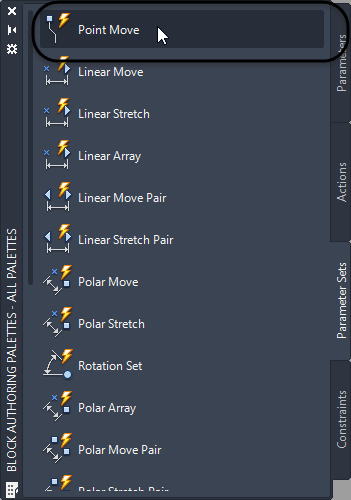
Snap to the center of the callout and put the label somewhere beyond the circle.

Select the Standard Grip and move it below the attribute so that it is not overlapping the rotation grip.
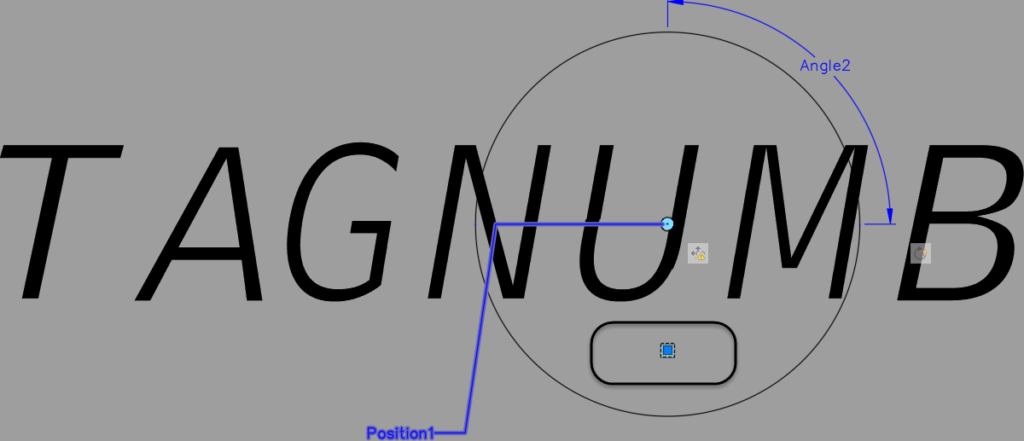
Right-click on the Move action and choose Action Selection Set > New Selection Set. Select the callout objects and the rotation parameter and action associated with it, and press ENTER.

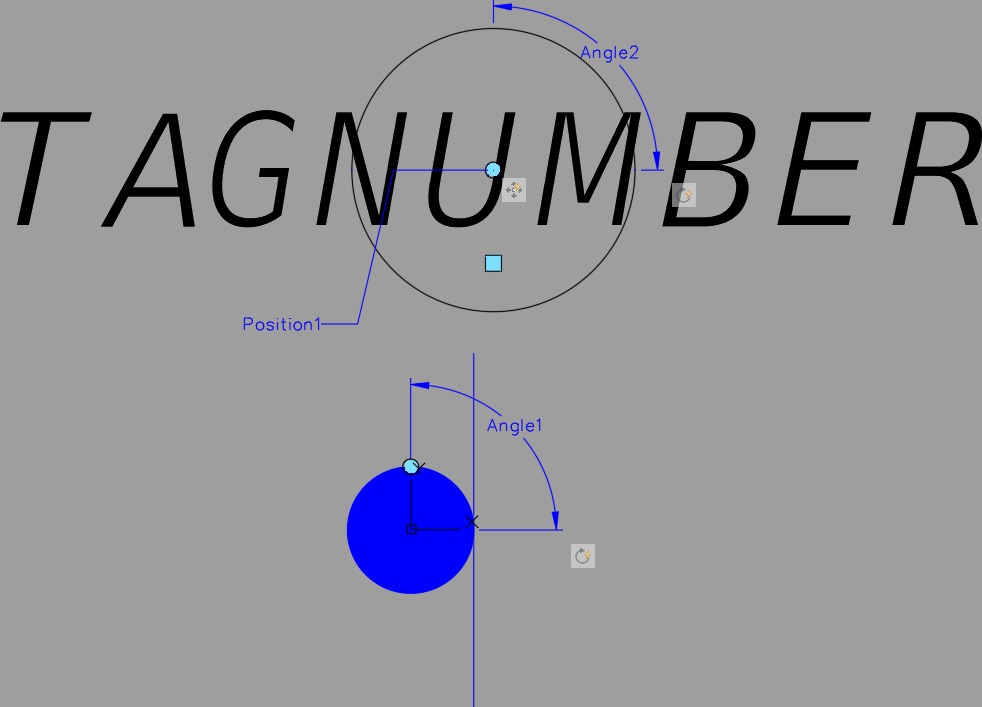
Now, let’s test out the block before we put it to good use. Navigate to the Ribbon > Block Editor tab > Open/Save panel > Test Block tool.

Select the block and notice the grips that appear. The circular grips are the rotation parameters, and the square grips are the move grips.
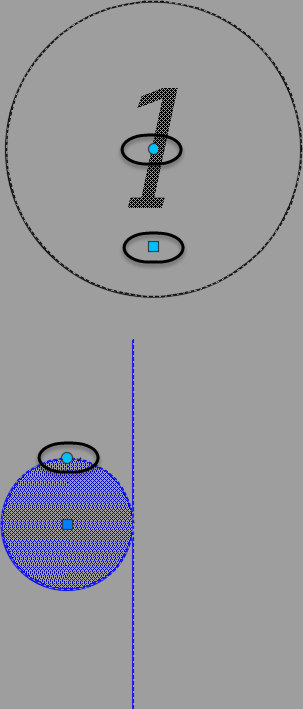
Clicking on the grips allows you to change the rotation and locations of the individual sets of objects.
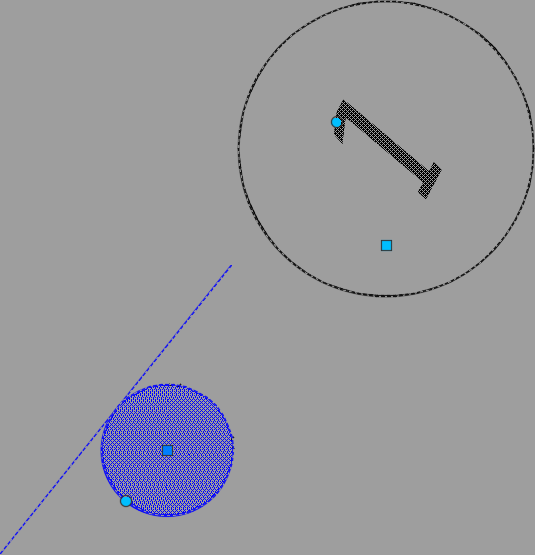
To close the Test Block environment, simply click the Close Test Block tool at the right end of the ribbon.

Close the Block Editor and save it. I now have a block that allows me to easily change to any orientation necessary to get my detour plan done. Dynamic blocks rule!
Source: Autodesk

