Metric vs. Imperial. Which side are you on? The United States is one of the very few countries in the world to use the imperial system, while everywhere else in the world uses the metric system. It’s important to know the difference and how to use metric and imperial in AutoCAD.
Contents
How to Change Units in AutoCAD
To fully understand both systems, we need to understand the UNITS dialog and its choices, along with the assumptions it makes and what your role is.
You can choose from Architectural, Decimal, Engineering, Fractional, or Scientific formats for displaying your units. (Notice that Metric is not a choice. We’ll get to that in a moment).
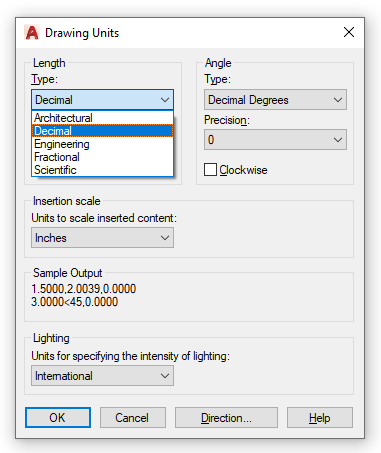
This is where AutoCAD tries to do some thinking for you, and it is best described directly from the HELP file: “The Engineering and Architectural formats produce feet-and-inches displays and assume each drawing unit represents one inch.” You’ve probably experienced this in either of these formats. Draw a line 12 units long, query it with LIST or PROPERTIES, and it will show as 1’.
The HELP file goes on to say: “The other formats can represent any real-world unit.” This is where you and your needs come in. AutoCAD gives you free will to make that unit whatever you want.
Since we want to use metric, you’ll need to decide prior to drawing anything what a unit will represent. It may be a millimeter, a meter, a kilometer, etc. Don’t forget to set the appropriate decimal accuracy for your desired units. Nothing in AutoCAD will tell you what that unit relates to. It’s in your head as you draw (and hopefully on a title block somewhere), as you make that same line 12 units long whether you mean for it to be 12mm, 12m, or 12km.
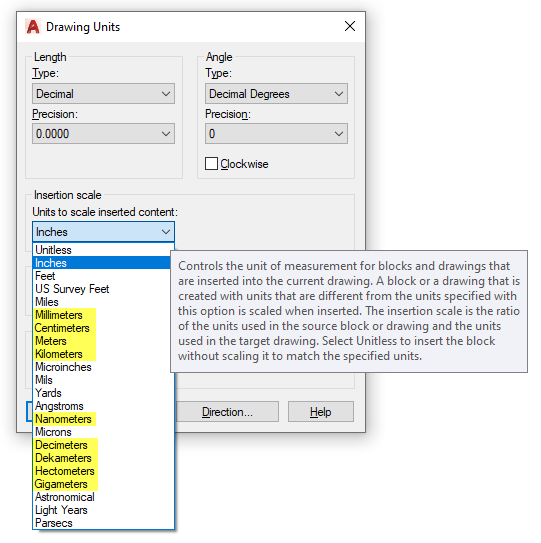
While you’re in the UNITS dialog box, make sure to choose the appropriate Insertion Scale, which controls the unit measurement for any blocks or drawings that are inserted.
How to Show Metric and Imperial Dimensions in AutoCAD
Now let’s say you’re at the stage where your metric drawing is complete. You live and work in the U.S., so you’re used to feet and inches (imperial), but you’ve set your drawing up to be based on one unit representing a millimeter, and now you’re ready to dimension it. You make sure your DIMSTYLE is set to the office standard, place your first linear dimension, and it displays as feet and inches. You’ve verified that your UNITS are set to Decimal with zero places of precision. Now what?
Here’s the secret. Dimension Styles have their own Units setting that is independent from the overall drawing units. In other words, you can have your drawing set up to be metric, but the DIMSTYLE is set to Architectural. That’s exactly how our previous example is set up.
So, the next important part to setting up your metric environment are your styles. Do not alter your office standards! Create new styles for your metric project. Typical text heights are 2.5mm (3/32″), 3mm (1/8″) and 6mm (1/4″). Please note that the imperial equivalents shown are approximations. We’ll get to how those are calculated in the next section.
Make sure you create new styles for Dimensions, Multileaders, and Tables if necessary. Assign your new Metric Text styles to these. Also, come up with a naming convention that not only sets them apart from your imperial styles, but also tells you what they are (e.g., Gen_Notes_3mm) and setting to be Annotative.
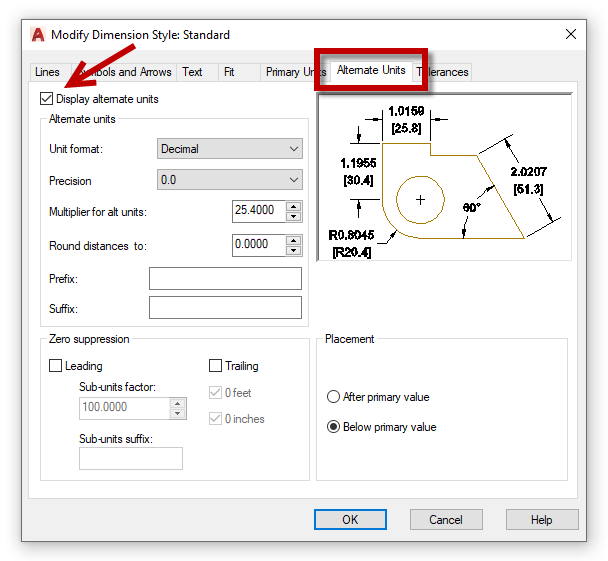
It’s worth noting here that sometimes you might want to have your design in imperial units, but also display the corresponding metric equivalent in the dimension. You can do this from the DIMSTYLE dialog. From the Modify (or Override) dialog box, click on the Alternate Units tab, and check the box in the upper left to turn the feature on.
Units here, units there, styles, settings, naming…if all that screams “Template” to you, you’re right. If you’re going to be doing any number of “the other system” higher than 1, I highly suggest you make a template (or templates) with all the proper settings.
How to Convert Imperial to Metric in AutoCAD (and Vice Versa)
If you’ve been in this business long enough, this has bound to happen to you. You design a project in one measurement system. Near the end, you get the word that oops it was supposed to be in the other. Or maybe you get an existing set of plans that need to be modified, but they’re in the wrong system. Either way, you must change from one to the other.
It’s time to learn your conversion factors. It all starts with this number: 25.4. Commit it to memory.
There are 25.4 millimeters to an inch. So, simply put, if you have a metric drawing and you need to make it imperial (feet and inches), you will have to scale it up 25.4 times. Conversely, if you want to change an imperial drawing to metric, it must scale down 25.4 times.
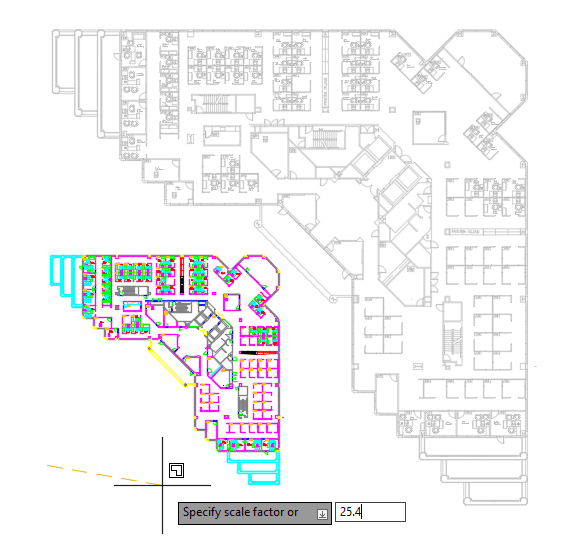
Sounds pretty straightforward, right? It is, as long as you’re only dealing with drawing elements. But, if you’re further along and you have dimensions, text, and other annotations in it, they will get scaled too, making them either 25.4 times too big or 25.4 times too small.
This is why I suggested that you make your Styles annotative. You can assign the new scale to them, and they’ll scale up or down appropriately. Even so, make sure to check your drawing carefully, as your annotation’s placement can sometimes be off. It may not be perfect right away, but it sure beats re-dimensioning and annotating from scratch.
Final Thoughts on How to Use Metric and Imperial in AutoCAD
It’s really no surprise that AutoCAD is tailored more towards imperial units than metric. After all, it was developed in the U.S., and as such, its initial user base used feet and inches. But times change, and as it developed its reach worldwide, methods for using the metric system were developed.
I hope we’ve given you some insight into metric vs. imperial and how AutoCAD handles them. So, the next time that international project throws you a curve, you’ll know what to do to quickly make it more successful.
Source: Autodesk


