It can sometimes be difficult to see geometry that is created when snapping to or tracing over point clouds, since the points can partially obscure the geometry. To help address this problem, you can adjust the transparency of the point cloud. By making a point cloud more transparent, you can more easily see the new geometry that you create.
To control the transparency of a point cloud, select a point cloud to activate the Point Cloud contextual ribbon. Then, in the Visualization panel, you can adjust the transparency of the point cloud by either clicking and moving the Transparency slider, or by entering a value in the adjacent Transparency field. The transparency is expressed as a percentage. A value of 0 means that the point cloud is not transparent. The higher the value, the greater the transparency, up to a maximum transparency of 90 percent.
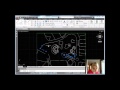
For example, drag the slider to increase the transparency of the point cloud. When you do, you can see that some 3D objects have been added to the point cloud.
Source: Autodesk