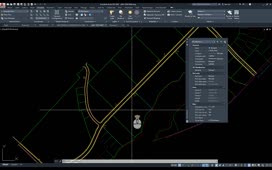
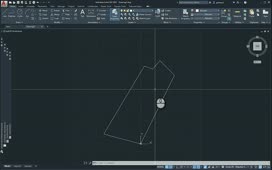
Dynamic input provides a command interface near the cursor in the drawing area. When dynamic input is turned on, which it is by default, a tooltip displays dynamically updated information near the cursor. When a command is in progress, you can specify options and values using dynamic input. Dynamic input is a very handy feature because you can see what the program is expecting you to do next without having to take your eyes off the cursor and look back down at the command line.
On the Home ribbon, in the Draw panel, click the Line tool. In the command line, you can see that the program shows you the name of the command and also prompts you to Specify first point. But with dynamic input turned on, you see this same prompt alongside the cursor.
Click in the drawing to specify the first point. As soon as you do, the program prompts you to specify the next point, and with dynamic input turned on, the prompt now appears both in the command window and near the cursor.
When you pick the next point, the prompt repeats, again both in the command line and near the cursor. Create a second line segment.
On the command line, you are prompted to Specify next point or [Close Undo.png], and the words Close and Undo appear inside square brackets and have gray backgrounds, because they are options. But notice that the dynamic input also includes the word “or” and to the right of the dynamic input tooltip, there is a small down arrow. When you press the Down Arrow key, you see a menu with these same two options, Close and Undo. You can choose one of these options by clicking the option, or by using the arrow keys on the keyboard to select the option and then press ENTER. For example, press the Down Arrow key to select the Close option and then press ENTER to create a final line segment from the endpoint of the last segment you created back to the starting point of the first line you created when you started the LINE command.
This also ends the command. You can see that the command has ended because in the command line, the program once again tells you to Type a command.
You can turn dynamic input off if you wish. To do this, on the Status bar, click the Customization button and select Dynamic Input in the menu, so that a check mark appears adjacent to that option. Then, click anywhere in the drawing area to close the menu.
Notice that now, a Dynamic Input button appears in the Status bar. Click this button to toggle off dynamic input. Then, start the LINE command again. Notice that now, you no longer see a dynamic input prompt near the cursor. The prompts only appear in the command line. Draw several line segments and then end the command.
You can see how useful dynamic input can be. Go back to the Status bar and click the Dynamic Input button to toggle it back on. Since it is unlikely that you would ever want to turn off dynamic input, there is no need to keep this button on the Status bar. It is just taking up space. So go back to the Customization menu and click Dynamic Input to clear the check mark.
Source: Autodesk


