Do you find yourself frequently lengthening or resizing objects? Or what about copying or moving and then rotating an object? Do you wish you could use one command to perform both a copy and scale? Do you wish you could stretch, move, copy, rotate, scale, or mirror objects without either typing the commands or clicking the ribbon? Then, it’s time to look at grips or maybe you already use grips and are looking for some new techniques.
Contents
What are Grips
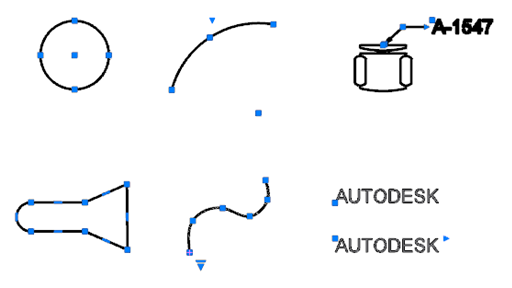
Grips are small squares, rectangles, and triangles that appear on selected objects. You can stretch, move, copy, rotate, scale, and mirror objects using grips without having to enter any commands.
Turning Grips On
First, let’s make sure grips are on.
- Right-click in the drawing area and select Options.
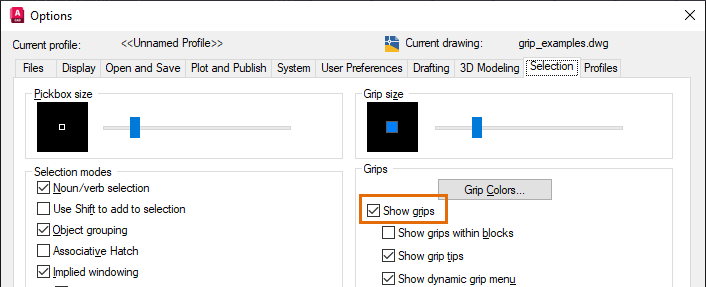
- In the Options dialog box, Selection tab, make sure that Show Grips is selected.
Using Grip Modes
Grip modes are the editing options that you can use when grips are selected. The default grip mode is STRETCH. Once you select an object’s grip, each time you press the Spacebar or Enter, the next mode becomes active. The grip mode order is:
- Stretch
- Move
- Rotate
- Scale
- Mirror
Let’s try cycling through the grip modes. For these examples we’ll use the Spacebar to change the grip mode, but Enter works as well.
- Draw a line and select it to display the grips.
There is a square grip at each end and one at the midpoint.
- Select one of the end grips.
It changes color to indicate it’s selected.
- Move the cursor around.
The line segment stretches as you move the cursor. The stretch is temporary until you select a point.
Note: When using grips, you can select points using any of the usual methods such as clicking in the drawing, entering coordinates, and using object snaps. - Press the Spacebar.
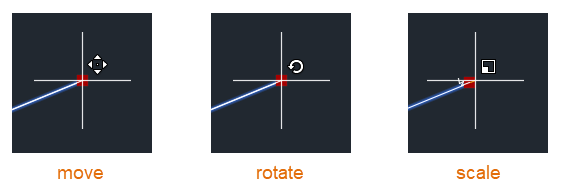
Notice that the command prompt now shows you’re in the move mode.
Note: Cursor badges indicate when you are in move, rotate, or scale grip modes but not stretch or mirror. - Move the cursor around and the line moves with it.
Again, until you specify a destination point the action is temporary. You can press ESC at any time to exit the action.
- Continue pressing the Spacebar to cycle through the grip modes.
The command prompt indicates the current mode. You can move the cursor to confirm the mode. Eventually you cycle back to the stretch mode.
- In any of the grip modes, type C and the press the Spacebar.
Now a copy is made while stretching, moving, rotating, scaling, or mirroring. Keep selecting destination points to create multiple copies while in any of the grip modes.
Try these same steps with arcs, circles, and polylines, selecting different grips on the various objects.
Changing the Base Point
The grip you select is the base point for the current grip mode. You can use the base point option to change this during any of the grip modes.
- Select the line previously drawn.
- Select one of the end grips.
- Press the Spacebar until you are in the rotate mode.
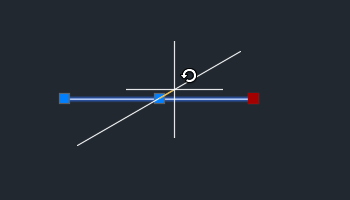
Notice that the line is rotating around the endpoint where you selected the grip. But let’s say you wanted to rotate it around the midpoint of the line.
- Type B and press the Spacebar to select the base point option.
- Select the midpoint grip as the new base point.
Note: You may need to press F3 to turn object snaps off.
- Rotate the line.
Multiple Copies
When using grips, you can stay in the grip mode and make multiple copies of an object. Let’s use rotation as an example.
- Draw a horizontal line.
- Select the line.
- Select one of the end grips.
- Press the Spacebar until the rotate grip mode is active.
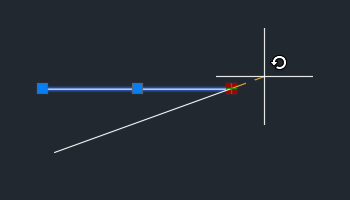
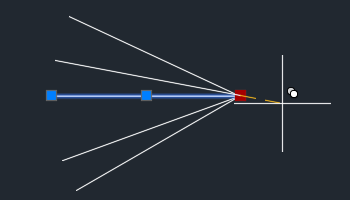
- Type C and press the Spacebar to copy the object as you rotate it.
- Enter 30 as the first rotation angle.
- Enter 20 as the next angle.
Notice the line is rotated and copied from the original line, not the previous copy.
- Enter -25 for the next angle.
- Press Esc to exit.
Using a Rotation Snap While Copying with Grips
Now we can take it a step further. Let’s say you have an object that you want to copy multiple times, and you want the rotation angle to be the same between each successive object.
- Draw a horizontal line.
- Select the line.
- Select one of the end grips.
- Press the Spacebar until the rotate grip mode is active.
- Type C and press the Spacebar to copy the object as you rotate it.
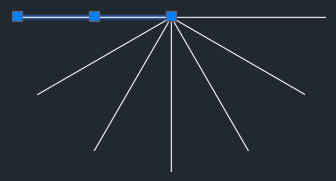
- Enter 30 as the first rotation angle.
This becomes the angle for the rotation snap for each copy.
- Hold down the Ctrl key and drag the cursor to create more copies.
Your cursor snaps to 30-degree angles as you drag it.
- Keep Ctrl pressed and continue clicking until you create several lines rotated from the original line at 30-degree increments.
Note: Experiment with pressing the Ctrl key and making a few copies, releasing the Ctrl key and making a few more copies, and finally pressing the Ctrl key again for a few more copies. Pressing the Ctrl key will snap to the angle used right before pressing Ctrl.
Using a Distance Snap While Copying with Grips
Like the snap rotation example, you can use a distance as a move snap while copying with grips.
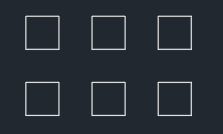
- Draw a 0.5 x 0.5 rectangle.
- Select the rectangle and select the grip on the lower-right corner.
- Press the Spacebar to switch to the move grip mode.
- Type C and press the Spacebar to copy the object rather than move it.
- Enter 1,0 to copy the object over 1 unit.
Note: If dynamic input (F12) is off, enter @1,0 to copy the unit over 1 unit.
- Hold the Ctrl key down while making the rest of the copies.
The preceding copy you made defined the snap distance for any subsequent copies made while holding Ctrl.
- Continue pressing Ctrl and click to use the snap distance while making more copies.
- Release Ctrl when you don’t want to use the snap distance for additional copies.
Grip Menus
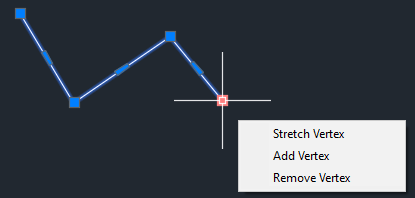
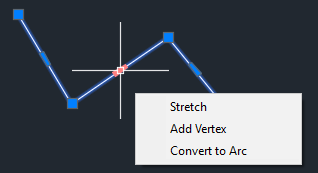
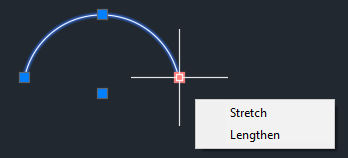
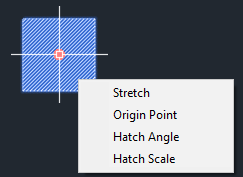
Instead of selecting a grip as in the previous exercise, just hover the cursor over a grip. A menu displays with actions associated with the grip. Depending on the object selected, and the grip, the menu options will vary. Not all grips have grip menus. Grips with menus are called multifunctional grips.
- Draw a polyline with at least three segments.
- Select the polyline.
- Hover the cursor over one of the end grips to see the grip menu.
- Hover the cursor over one of the segment’s midpoint grips to see its grip menu.
- Click a menu option and try it. Press Esc to exit.
- Try this again with an arc.
- And finally, with a hatch object.

Selecting Multiple Grips While Stretching
There may be times when you want to select more than one grip at a time. Say you want to stretch from two or more grips while not affecting the geometry between those grips.
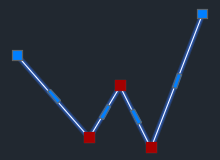
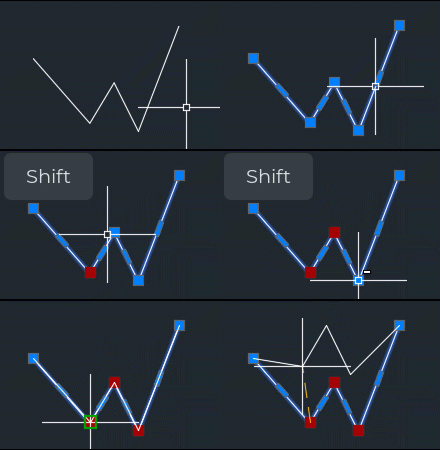
- Draw a polyline similar to the following image.
- Select the polyline.
- Before you select any grips, hold down the Shift key.
- While pressing Shift, select grips as shown in the following image.
- Once you have the grips selected, release the Shift key.
- Drag one of the grips and notice how the segments between the grips remain constant while the other segments stretch.
Grips System Variables
| System Variable | Description | Default Value | Saved In |
|---|---|---|---|
| DYNINFOTIPS | Controls whether tips are displayed for using Shift and Ctrl when editing with grips. | 1 | Registry |
| GRIPBLOCK | Controls the display of grips in blocks. | 0 | Registry |
| GRIPCOLOR | Controls the color of unselected grips. | 150 | Registry |
| GRIPCONTOUR | Controls the color of the grip outline. | 251 | Registry |
| GRIPDYNCOLOR | Controls the color of custom grips for dynamic blocks. | 140 | Registry |
| GRIPHOT | Controls the color of selected grips. | 12 | Registry |
| GRIPHOVER | Controls the fill color of an unselected grip when the cursor pauses over it. | 11 | Registry |
| GRIPMULTIFUNCTIONAL | Specifies the access methods for multifunctional grip options. | 3 (bitcode) | Registry |
| GRIPOBJLIMIT | Suppresses the display of grips when the selection set includes more than the specified number of objects. | 100 | Registry |
| GRIPS | Controls the display of grips on selected objects. | 2 | Registry |
| GRIPSIZE | Sets the size of the grip box, in device independent pixels. | 5 | Registry |
| GRIPSUBOBJMODE | Controls whether grips are automatically made hot when subobjects are selected. | 1 (bitcode) | Registry |
| GRIPTIPS | Controls the display of grip tips when the cursor hovers over grips on dynamic blocks and custom objects that support grip tips. | 1 | Registry |
Source: Autodesk
