Profiles can be created in Civil 3D in a number ways. No matter which way you create a profile, it will always be associated with a horizontal alignment.
In the Prospector, expand Alignments > Centerline Alignments > First Street. You can see the profiles are listed below the alignment, almost as children of the parent alignment. The same thing is true for the profile views, where you can see a single profile view called First Street 1. Underneath the profile views are the Sample Line groups, which contain the sample lines or cross-section sample lines and section views or Cross Section views associated to the alignment.
Any time you are working with profiles in Civil 3D, you are really working with two different objects. The first is the profile line that represents the profile data of a surface. And the second object you are working with is the profile view, which is the grid that the profile line is placed on to show the profile in some scale, both horizontally and vertically.
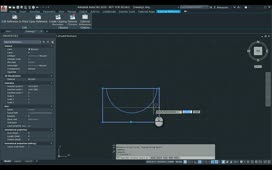
To understand this better, zoom in on the First Street 1 profile views. Select the grid. Understand that you are selecting the profile view when you select the grid. The Profile View contextual tab appears on the ribbon.
This profile view is named is First Street 1. Inside of that profile view, there are two different profile lines. The finished grade profile is represented by the blue line, and the red line is the existing ground profile that was sampled from a surface. Also, grips on the finish grade profile line allow you to edit the profile. The finished grade profile line is also known as the layout profile. You can make edits to a layout profile, but not to a profile sampled from a surface.
When you select the profile of the existing ground, no grips become available because that is sampled and continuously updated from the surface within the drawing.
To change a profile sampled from a surface, you must change the surface. Once the surface updates, the profile updates based on the changes made to that surface.
Press ESC to deselect the profile.
While it can be confusing to look at two profile lines within a single profile view, if you think of these as being similar to a viewport that you might use in paper space to display your profile views, it is easier to understand what they represent.
You can pick the profile view and move it around, and as you do, all the profile data inside the view is redisplayed in its new location. You can freely move these views around and readjust them in the drawing.
You can also copy the profile view using the AutoCAD Copy command. When you do, zoom back in and you can see that all the same data is displayed in it. However, when copying a profile view, be very careful to grab only the grid and nothing else. Otherwise, not only will you make a single copy of the grid, but you will also create a double copy of each item that you grabbed inside the grid.
Look in the Prospector, and you can now see that the Profile View has a (1) after it, indicating that this is a copy. Expand Profiles and here, you can see that both the existing ground and finished grade profile lines have (1) after them, indicating that they are copies too. Any time an object is copied in Civil 3D, unless you rename the object through the object properties, the original name will be used, and “(1)” will be added to the suffix of the name to make it unique. To you, that (1) means it is a copy of an original object.
Select the finish grade profile line. Click and drag a grip to make a change. The change is reflected in both of the original profile view and its copy. This is because if you make changes to the original profile, you can see those changes occur in both views simultaneously because you are editing the same data. These are not copies within two different profile views-they each contain the same exact data. Understand that you essentially copied the view and not the profile line itself. So there are two views, but only one profile line shown in each view.
You can erase one of the profile views. Remember to grab only the grid of the profile view. Do not use a window or crossing window for a selection method around the entire profile view itself. If you do, not only will you erase the profile view, but you will also erase your profile line, along with all the data and any changes you made to it. You would then have to re-create or resample that profile information to get your profile line back. So, select the grid and then erase the profile view. Now, the profiles are no longer displayed. In the Prospector, you can see that the profile view is no longer there, but under Profiles, the profiles for Finished grade and Existing ground are still there.
There are a number of ways you can create profile data within Civil 3D. You can find all these options on the ribbon, Home tab, in the Create Design panel by expanding Profile.
You can create a surface profile by sampling a surface within the drawing; this is typically used when sampling an existing ground surface. However, you can also sample along design surfaces that you may have created with some grading tools or subsurface information that you created from geotechnical information. You can sample a profile along any surface within Civil 3D. You can use profile creation tools that are very similar to the alignment creation tools, because really, a profile is just a vertical alignment. You can lay them out by either sketching in entities or by picking PVIs for the profile. You can also create a best fit profile, where Civil 3D will find a logical path between a series of surfaces, feature lines, COGO points, or AutoCAD objects. You can create a profile from a file. For example, if you have a specially formatted ASCII text file, you can import that and have it draw the profile for you. You can also create a quick profile. Quick profiles disappear from the model when you save the file. They are temporary profiles that let you take a quick look at an object in profile. Quick profiles are used with 2D or 3D polylines, lot lines, feature lines, survey figures, and even a series of points. You can create superimposed profiles, which allow you to superimpose profile data from other alignments onto the profile view for misalignment. And finally, you can create profiles from a corridor, so that when there are feature lines within a corridor, you can extract alignment and profile data from those feature lines in that corridor to be displayed in profile views.
Once profiles are created, they can be edited and labeled very similarly to horizontal alignments. Click the Settings tab and under Profile, expand Profile Styles. Under this folder are the styles for the profile line object.
There is a folder for design checks so that you can use criteria-based design on a profile line. There are also Label Styles. These label styles include label sets that will be selected when you create the profile. The label sets are set up very similarly to the alignment label sets. These label sets might include labels for vertical curves-both crest and sag-or grade breaks, or slopes on a line, spaced or weeded every so many feet.
In addition to labeling the profiles themselves, there are also styles and label styles for the profile view. Expand the Profile View collection on the Settings Tab. These allow you to select a profile view style. A profile view style controls the display of the grid, including the vertical exaggeration and the labeling of the horizontal and vertical axes. There are profile view label styles, with which you can label stations and elevations, or depths of an object in the grid or projections between objects. With all of these styles, you have a great deal of control over the display of the profile and the profile view within Civil 3D.
Civil 3D gives you a simple and easy way to create profiles and represent them in a profile view for plan production.
Source: Autodesk


